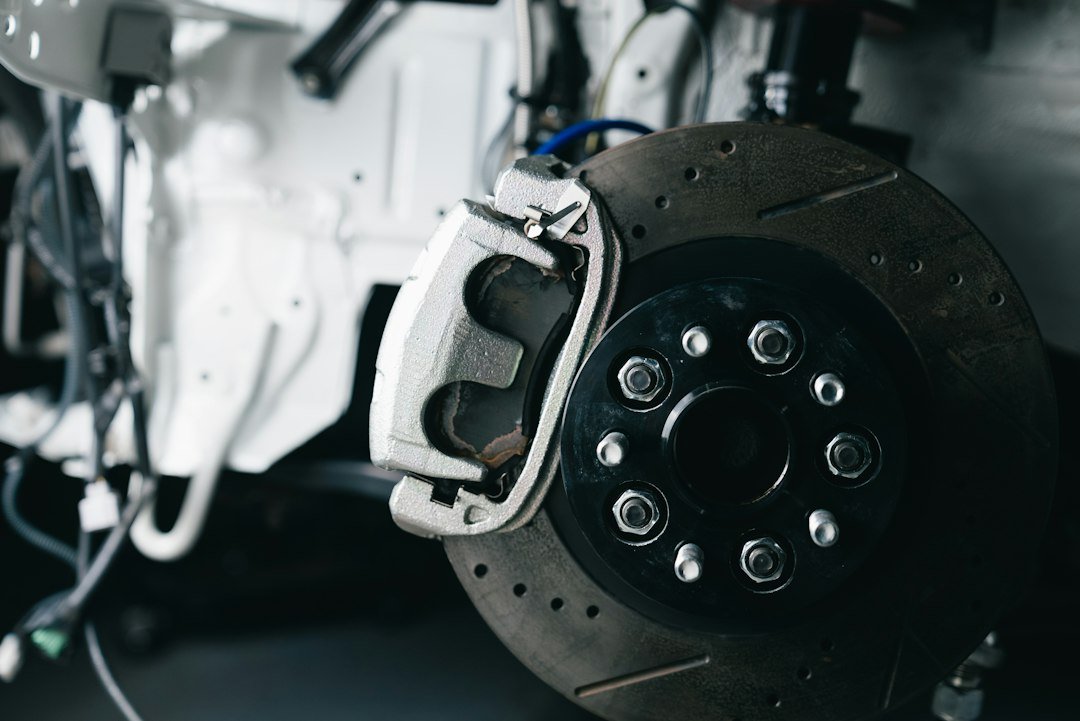
You can save $150 to $300 by learning how to bleed brakes yourself instead of taking your car to a shop. Whether you’re dealing with soft, spongy pedal feel or just replacing worn pads, knowing how to bleed brakes using manual and one-person techniques puts you in complete control of your brake system’s safety and performance.
Quick Reference: Manual Brake Bleeding Methods
| Method | Tools Required | Time Needed | Skill Level | Best For |
|---|---|---|---|---|
| Manual Two-Person Bleeding | Wrench, bleeder bottle, jack, brake fluid | 45-60 minutes | Beginner to intermediate | Complete brake system flush |
| One-Person Gravity Bleeding | Bleeder bottle, brake fluid, wrench | 2-4 hours | Beginner | Minor air removal, patience available |
| One-Person Pressure Bleeding | Pressure bleeder, wrench, brake fluid | 30-45 minutes | Intermediate | Faster solo work, recurring bleeds |
| Manual Pedal Pumping | Wrench, bleeder bottle, basic tools | 30-45 minutes | Beginner | Emergency brake feel restoration |
Before You Start: Essential Preparation Checklist
- Park on level ground and engage the parking brake firmly
- Lift the vehicle safely using a floor jack and secure with jack stands
- Remove all four wheels or just the ones you’re working on for accessibility
- Locate the bleeder screws on each caliper (usually small nipples on the back)
- Check your owner’s manual for brake fluid type: DOT 3, DOT 4, or DOT 5.1 differ significantly
- Gather new, unopened brake fluid in the correct specification for your car
- Have rags, a small container, and clear vinyl tubing cut to fit the bleeder screws
- Identify the brake bleeding sequence: almost always rear driver, rear passenger, front driver, front passenger
Understanding Why You Need to Bleed Brakes
Air bubbles inside brake lines compress instead of transfer hydraulic pressure to your calipers and wheel cylinders. Your pedal feels soft, mushy, or travels too far before gripping. You’d think a simple visual inspection would tell you if air is present — it usually doesn’t, because trapped air sits deep in the system where you can’t see it.
I’ve been using manual bleeding methods for years on my own vehicles, and the difference in pedal firmness after a proper bleed is immediately obvious. You press the brake pedal and feel solid, progressive resistance instead of that uncomfortable give that lets your foot travel an inch before anything happens. This matters because your brakes are the single system standing between you and a collision at 60 miles per hour.
Most people don’t realize how common air gets trapped during routine maintenance. Changing brake pads, replacing a line, flushing old fluid, or even topping off the reservoir can introduce air bubbles into the hydraulic circuit. The longer air sits in your system, the more it wants to float upward and lodge in the highest points where it’s hardest to remove.
Manual Two-Person Bleeding: The Traditional Method
Condition and Audience
This method works best when you have a helper available and your brake system has moderate air that needs removal. Both the person inside the car and the person at the caliper need clear communication and calm focus. If you’re working alone, skip to the one-person methods below.
Supplies You’ll Need
Get a wrench that fits your bleeder screws exactly, a clear vinyl tube that slides onto each bleeder, a small jar or container to catch old brake fluid, fresh brake fluid matching your car’s specification, and clean rags. I’ve been using the same basic setup for years and it works without fancy equipment.
Step-by-Step Process
- Fill the master cylinder reservoir completely with new brake fluid and keep it topped off throughout the entire process.
- Locate the first bleeder screw in the correct sequence: rear driver wheel, rear passenger, front driver, front passenger.
- Attach the vinyl tube to the bleeder screw and run the other end into your collection jar.
- Have your helper sit inside the car with their foot off the pedal initially.
- Loosen the bleeder screw a quarter turn so fluid can flow but you maintain control.
- Your helper pumps the brake pedal firmly five to seven times, then holds the pedal down with steady pressure.
- Tighten the bleeder screw while the pedal is still pressed, trapping fluid below the screw.
- Tell your helper to release the pedal slowly.
- Open the bleeder screw again and watch the tube for steady fluid flow followed by a brief air bubble spurt.
- Repeat this cycle at each wheel, watching the tube until only solid fluid flows with no air bubbles visible.
- Move to the next wheel in sequence and repeat the entire process.
- After all four wheels, top off the master cylinder and perform a final pressure test by depressing the pedal fully and checking for firmness.
Here’s where most people give up: after the first couple of cycles, they think they’re done because the air seems to be gone. Don’t stop early. Each wheel needs five to eight complete pump-and-release cycles to fully purge trapped air. Rushing this creates a false sense of completion, and you’ll end up with soft brakes again within a week.
One-Person Gravity Bleeding Method
You don’t need a partner for this to work.
Why Gravity Matters
Gravity pulls old fluid and air bubbles downward through the brake lines toward each bleeder screw. Set up the system and let physics do most of the work while you handle other preparations or monitor progress. This takes longer than manual pumping but eliminates the need for a second person standing in the cold holding a wrench.
Your Gravity Setup
Attach the vinyl tube to the first bleeder screw and run it down into a container positioned below the caliper. Fill a clear bottle with fresh brake fluid and position it above the master cylinder using a makeshift stand or shelf. Insert the brake fluid bottle’s tube into the master cylinder reservoir so fluid flows steadily downward through gravity. Crack open the first bleeder screw a quarter turn and let gravity pull old fluid and air through the line for 15 to 30 minutes.
Watch the tube outlet. Initially you’ll see dark old fluid, then gradual lightening as new fluid replaces the old, then air bubbles rising up and out. When only clear new fluid flows steadily for several minutes with no bubbles, close that bleeder screw and move to the next wheel. The entire gravity process takes two to four hours for all four wheels, but your physical involvement is minimal.
One-Person Pressure Bleeding: The Fastest Solo Option
For drivers who want to speed up the solo process, pressure bleeding using a powered pump cuts your time roughly in half compared to gravity methods. A pressure bleeder reservoir connects to compressed air or an electric pump that forces fresh fluid through the system at controlled pressure.
Fill the pressure bleeder with new brake fluid, attach the connection to your master cylinder, and set the air pressure to the manufacturer’s recommended PSI for your car. Attach the vinyl tube to your first bleeder screw and open the valve slightly. Pressure from above pushes fresh fluid downward and forces air and old fluid out through the bleeder. Monitor the tube flow and close the bleeder once only clean fluid runs steady. Move to the next wheel and repeat.
This method demands more equipment investment but delivers professional results in your driveway. I’ve been using pressure bleaders for maintenance on multiple vehicles and the consistency is noticeably better than gravity or manual methods alone. The fluid temperature stays more stable and you avoid the fatigue of repeated pedal pumping.
Common Mistakes That Ruin Your Brake Bleed
Using the wrong brake fluid type, mixing old and new fluid, or forgetting to top off the master cylinder during the bleed are the three fastest ways to undo good work. Each one reintroduces air back into the system or damages internal seals.
Another frequent error is opening the bleeder screw too far, which can strip the threads or cause uncontrolled fluid loss. Open only a quarter turn, just enough for steady flow. Tightening too hard also damages the screw and caliper. Hand-tighten after closing, then add only slight wrench pressure.
Don’t bleed a system that’s already full of brake fluid at the master cylinder, then wonder why fluid keeps leaking out the bleeder tube. The reservoir needs constant monitoring. As fluid leaves through the bleeder, that air space pulls vacuum which sucks more fluid down, which keeps the system primed and prevents air from re-entering from above.
How to Know When You’re Actually Done
Perform a firm pedal pressure test after finishing all four wheels. Press the brake pedal to the floor slowly and deliberately. If the pedal feels solid, resists your pressure consistently, and stops about one to two inches above the floor, you’ve succeeded. If it feels spongy, travels more than two inches, or suddenly drops further partway through, air remains in the system.
Go back through each wheel one more time using the pump cycle, even if fluid has already cycled through. Stubborn air pockets hide in tight spots and need multiple passes to dislodge. This is the part that actually matters — skipping the verification step means you drive away thinking the job is done when it’s not.
My Picks for This
- Dorman Bleeder Screw Wrench Set includes multiple sizes so you can fit any caliper nipple without rounding the heads.
- Actool Brake Bleeder Kit contains clear vinyl tubing, collection bottles, and catch containers all matched to standard bleeder sizes for quick setup.
- Phoenix Systems Power Bleeder delivers consistent pressure-fed bleeding for one-person jobs without the fatigue of manual pumping cycles.
- Valvoline SynPower Advanced Full Synthetic Brake Fluid meets DOT 4 specification and resists moisture absorption that degrades braking performance over time.
- Floor Jack and Jack Stand Kit from Torin or Craftsman keeps your vehicle safe and stable while you work underneath, eliminating the risk of catastrophic failure during your bleed job.
Frequently Asked Questions (FAQ)
Q1. How often should I bleed my brakes?
Every two to three years as routine maintenance ensures old fluid and absorbed moisture drain out, keeping your hydraulic system responsive. If you notice soft pedal feel, sponginess, or brake fade during spirited driving, bleed immediately regardless of the service interval.
Q2. What’s the difference between DOT 3, DOT 4, and DOT 5.1 brake fluid?
DOT 3 and DOT 4 are glycol-based and absorb moisture over time, which lowers boiling point and can cause brake fade in extreme conditions. DOT 5.1 has higher boiling point and resists moisture better. Check your owner’s manual for the exact specification your car requires — mixing types creates chemical incompatibility and system failure. Never guess on brake fluid type.
Q3. Can I bleed brakes alone, or do I absolutely need a helper?
You can bleed brakes alone using gravity methods or a pressure bleeder. Manual pumping requires someone inside the car controlling the pedal while you manage the bleeder screw, but one-person methods eliminate that need. Gravity takes longer but works without assistance.
Q4. Why does my brake pedal feel soft immediately after I bleed the brakes?
Air remains in the system if you didn’t complete enough pump cycles, topped off the reservoir inconsistently, or didn’t follow the correct wheel sequence. Go back through the entire bleed procedure, but this time extend each wheel to ten complete cycles instead of five. Also verify you’re using the exact brake fluid type your car requires.
Q5. Should I replace my brake pads before or after I bleed the brakes?
Replace pads first, then bleed. Fresh pads move calipers outward as they seat, which can reposition internal seals and trap air. Bleeding after pad replacement ensures that repositioned air gets pushed out through the bleeder screws.
Q6. What should I do with old brake fluid I’ve drained?
Never pour old brake fluid down the drain or into the ground — it’s a hazardous waste. Place drained fluid in a sealed container and take it to your local hazardous waste collection site or an auto parts store that accepts used fluids. Most accept old brake fluid free of charge.
Q7. How can I tell if my brake system has a leak instead of just air?
Bleed the brakes completely. If the pedal feels firm immediately after, then gradually goes soft over days or weeks, a leak is present. If the pedal stays soft immediately after bleeding, air remains in the system. Leaks require caliper or line replacement; air removal requires more thorough bleeding cycles.
This post is for informational purposes only and does not constitute professional mechanical advice, legal advice, financial advice, or insurance guidance. Automotive repairs, installations, and modifications involve inherent risks — always consult a certified mechanic or licensed professional before performing any work on your vehicle. Car prices, insurance rates, EV tax credits, product specs, and availability are subject to change without notice and may vary by location, dealership, and individual circumstances. Always verify current details directly with manufacturers, retailers, dealerships, insurance providers, and relevant government agencies before making any purchase or financial decision. Fuel economy figures, EV range estimates, and performance data referenced in this post are based on manufacturer or third-party estimates and may differ from real-world results. This site may contain affiliate links — if you purchase through our links, we may earn a commission at no additional cost to you. Product recommendations are based on general research and editorial judgment; we do not guarantee suitability for your specific vehicle, driving conditions, or personal situation. Always read product instructions, vehicle owner manuals, and safety warnings before use.