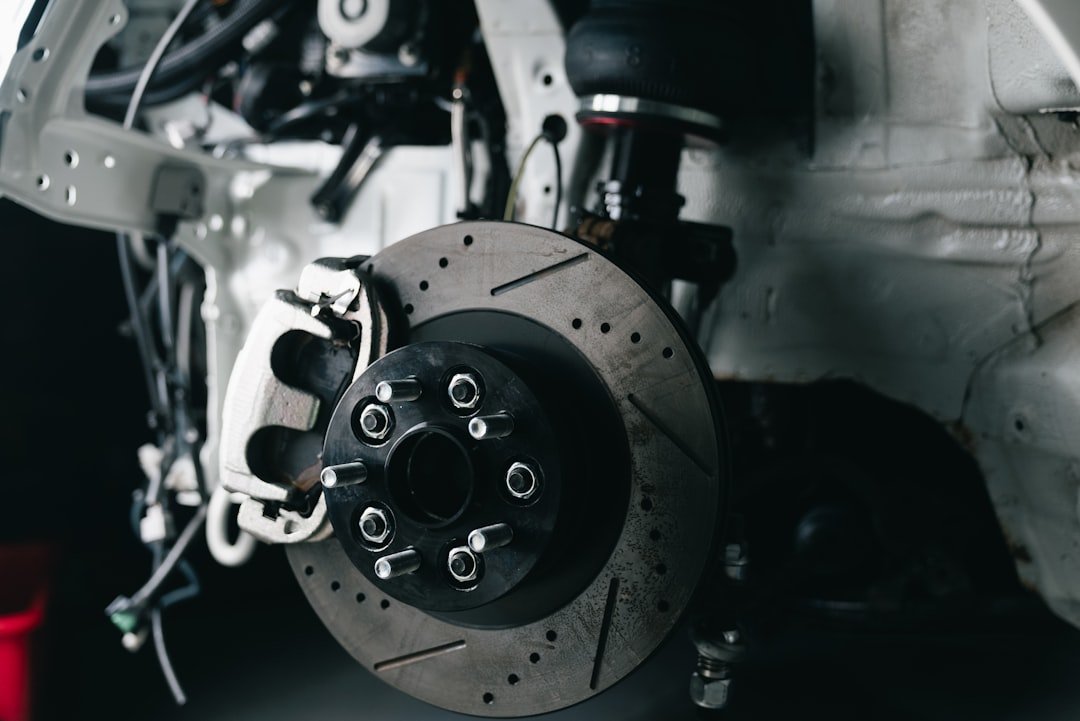
Your brake pedal feels spongy at a stoplight, or it sinks farther than it used to after you changed a caliper, hose, or wheel cylinder. That is the usual reason people learn how to bleed brakes at home. The job removes trapped air from the brake fluid, but it only works if the system has no active leaks and the master-cylinder reservoir never runs dry. Done carefully, how to bleed brakes at home is a manageable driveway job for a beginner with a helper.
Brakes are not a place to rush. If the pedal goes to the floor, brake fluid is pouring out, a brake warning light stays on, or the vehicle will not stop normally, do not drive it. Have the vehicle inspected or transported to a repair shop. Bleeding removes air. It does not repair a rusted brake line, failed master cylinder, stuck caliper, worn pads, or an internal ABS problem.
What bleeding the brakes actually does
A hydraulic brake system relies on brake fluid because fluid does not compress much under normal braking pressure. Air does compress. A small bubble can make the pedal feel soft, give it extra travel, or make pedal feel inconsistent. Bleeding pushes fluid through each brake circuit until old fluid and air bubbles exit through the bleeder screws.
You may need to bleed the system after opening a brake line, replacing a caliper or wheel cylinder, replacing a flexible hose, installing a new master cylinder, or letting the reservoir run low. Some owners also flush brake fluid on the maintenance interval listed in the owner’s manual. A flush replaces old fluid throughout the system. A quick bleed may only remove air from one corner after a small repair.
Before starting, identify the problem. If one bleeder screw was opened for a caliper replacement and the reservoir stayed full, bleeding that corner may be enough on some vehicles. If the reservoir emptied, air may have entered the master cylinder or ABS hydraulic unit. Those situations can require a specific procedure, sometimes with a scan tool that cycles the ABS valves. Check the factory service information for your exact year, model, and brake system before assuming the standard pedal method will cover it.
Tools and supplies to gather
- Brake fluid with the exact DOT rating specified on the reservoir cap or in the owner’s manual.
- A box-end wrench that fits the bleeder screw. Six-point flare-nut style wrenches are helpful when screws are rusty.
- Clear vinyl hose that fits snugly over the bleeder nipple.
- A clean catch bottle or jar. Put a little fresh brake fluid in its bottom so the hose end stays submerged.
- A helper to operate the brake pedal, plus gloves and safety glasses.
- Jack, jack stands, wheel chocks, and a lug wrench if wheel removal is necessary.
- Brake cleaner and clean lint-free rags for spills.
Use fresh fluid from a sealed bottle. Brake fluid absorbs moisture from the air, so an old opened bottle is a poor choice for a full fluid service. Never reuse fluid collected in the catch bottle. Also keep fluid away from paint, wheels, and plastic trim. It can damage finishes quickly. Wipe spills at once, then clean the area with the appropriate product.
Do not guess at fluid type. DOT 3, DOT 4, DOT 5.1, and DOT 5 do not all behave the same way. DOT 5 is silicone-based and generally should not be mixed with conventional glycol-based fluid. The reservoir cap is the first place to check. If it is unclear, confirm the specification through the manufacturer information or a reputable parts supplier using the vehicle identification details.
How to bleed brakes at home step by step
Park on solid, level ground. Put an automatic transmission in Park or a manual in gear, apply the parking brake where appropriate, and chock the wheels that will remain on the ground. If you lift the vehicle, loosen lug nuts before raising it, support it on properly rated jack stands, and never work under a vehicle held only by a jack.
- Find the master-cylinder reservoir. It is usually on the driver-side firewall under the hood. Clean dirt from around the cap before opening it. Dirt inside the reservoir can cause trouble later.
- Fill the reservoir to the marked level. Add only the specified fresh brake fluid. During the whole job, inspect the level after every few bleeding cycles. Do not let it drop below the minimum mark. If it runs dry, you may pull air into the master cylinder and create more work.
- Confirm the wheel order. Many vehicles use the wheel farthest hydraulically from the master cylinder first, often right rear, left rear, right front, then left front. That pattern is common, not universal. Split-diagonal brake circuits, rear-wheel ABS systems, and some modern vehicles use a different order. Use the manufacturer procedure if available.
- Access the first bleeder screw. Remove the wheel if needed. The screw is usually near the top of the caliper or wheel cylinder. Spray external grime away, remove the rubber dust cap, and test-fit the wrench. Do not force a severely corroded bleeder. Snapping one can turn a simple job into a caliper or wheel-cylinder replacement.
- Attach the hose and catch bottle. Push one end of the clear hose over the bleeder nipple. Route the other end into the bottle, with the hose tip below the fluid level. This makes bubbles easy to see and reduces the chance of air being drawn back through the hose.
- Build pedal pressure. Tell your helper to slowly press the pedal three or four times, then hold steady pressure. The helper should say “holding” and keep pressure on the pedal until you give the next instruction.
- Open, then close, the bleeder. Turn the screw open only enough for fluid to flow, usually about a quarter turn. Fluid and bubbles will travel through the clear hose. Before your helper releases the pedal, close the bleeder screw. Then tell them to release the pedal slowly. The order matters: pedal held down, screw opened, screw closed, pedal released.
- Repeat until the fluid is clean and bubble-free. Watch the hose. Large bubbles may appear early. Continue until the stream has no visible bubbles and the fluid looks reasonably fresh if you are flushing the system. Check and refill the reservoir every two or three cycles, or more often if the level falls quickly.
- Move through the remaining wheels. Refit the dust cap at each completed corner, then follow your vehicle’s correct wheel sequence. Keep the catch bottle upright and do not let the hose fall off the nipple.
- Set the final reservoir level. When all corners are complete, fill only to the MAX line. Reinstall the cap securely. Do not overfill, since fluid level rises as brake pads wear and can spill during later service.
Bleeder screws need to be snug, not overtightened. They are small and easy to damage. If you have the factory torque specification, use it. Otherwise, seat the screw gently after flow stops and check it for seepage. A shop manual is the right source for a torque value.
Checks before the road test
With the engine off, press the brake pedal several times. It should become firm as vacuum assist is used up. Hold firm pressure for about 30 seconds. The pedal should not steadily sink. A slight change when the engine starts is normal because the brake booster adds assist, but the pedal should still feel solid and predictable.
Look at every bleeder screw, hose connection, caliper, wheel cylinder, and the ground beneath the vehicle for fresh fluid. Reinstall wheels, tighten lug nuts in the manufacturer’s specified pattern and torque, and remove the jack stands. Then test the brakes at very low speed in a clear area before joining traffic. Start with a gentle stop. If the pedal remains soft, pulls hard, needs pumping, or a warning light appears, stop driving and inspect the system.
Brake fluid is hazardous waste in many areas. Pour the used fluid into a sealed, labeled container and take it to a local recycling or hazardous-waste facility if one accepts it. Do not pour it into a drain, onto the ground, or into used engine oil.
Common mistakes that cause a soft pedal
The biggest mistake is allowing the reservoir to run empty. Once that happens, air can enter the master cylinder. You may need to bench bleed the master cylinder, which is often easier with it removed, or use the vehicle-specific procedure. Do not keep pumping blindly and expect the pedal to recover.
Another common issue is releasing the pedal while the bleeder is still open. That can pull air back in through the screw threads or hose. Keep the communication simple with your helper: “pump,” “hold,” “open,” “closed,” and “release.” Slow pedal strokes are better than fast stomps, especially on an older master cylinder whose internal seals have spent years traveling in a limited section of the bore.
Air can also hide because a caliper is installed on the wrong side. The bleeder screw must sit at the highest point of the caliper. If it points downward, air stays trapped above it and bleeding will never fully clear the system. This happens more often than people expect after replacing calipers.
If you opened the hydraulic system near an ABS unit, a normal bleed can leave air trapped inside the modulator. Some vehicles need a scan tool procedure to command the ABS pump and valves during bleeding. Others have a manual sequence. This is one of those cases where correct vehicle-specific information matters more than generic advice.
FAQ
Can one person bleed brakes at home?
Yes. A pressure bleeder is usually the cleanest one-person method because it pressurizes the master-cylinder reservoir while you open each bleeder. Vacuum bleeders can work too, though bubbles around the hose connection may look like air in the brake system. The two-person pedal method is simple and inexpensive, which makes it a good first approach when you have a reliable helper.
How much brake fluid will I need?
For a basic bleed at one corner, a small amount may be enough. A full flush often takes roughly one or two small bottles, depending on the vehicle and how dark the old fluid is. Buy enough of the correct fluid to keep the reservoir safely full throughout the job. Check the manual for capacity guidance rather than relying on a universal number.
Should the engine be running while bleeding?
Usually, use the engine off for the pedal bleeding process. This gives a firmer pedal feel and avoids brake-booster assist changing the pedal travel. The final pedal check can include starting the engine after the bleeding is complete. Follow the factory procedure if your vehicle specifies something different.
Why is my pedal still soft after bleeding?
There may still be air in the lines, the wheel order may be wrong, a bleeder may be leaking air, or the reservoir may have run low during the job. A soft pedal can also come from a failing master cylinder, flexible hose issue, rear drum brake adjustment, or air trapped in the ABS unit. Check for leaks first, then verify the proper procedure for the vehicle. If the pedal is not safe and consistent, have a qualified repair shop diagnose it.
Can I bleed only one brake caliper?
You can often bleed one corner after replacing that caliper or opening only its hose connection, provided the reservoir never ran low and the pedal is firm afterward. If fluid is old, multiple lines were opened, or the pedal still feels wrong, a full system bleed is the safer next step. Confirm the procedure for the specific vehicle, especially if it has ABS or electronic brake control systems.
Related posts
This article is for general informational purposes only and is not mechanical, legal, financial, or insurance advice. Prices, insurance rates, tax credits, and manufacturer-stated fuel economy or EV range are estimates that change over time and vary by vehicle, region, and provider — always verify current figures with a dealer, mechanic, insurer, or official source before making a decision.
Disclosure: This post may contain affiliate links. If you click through and make a purchase, we may earn a commission at no extra cost to you. We only recommend products we’ve researched or genuinely believe in.