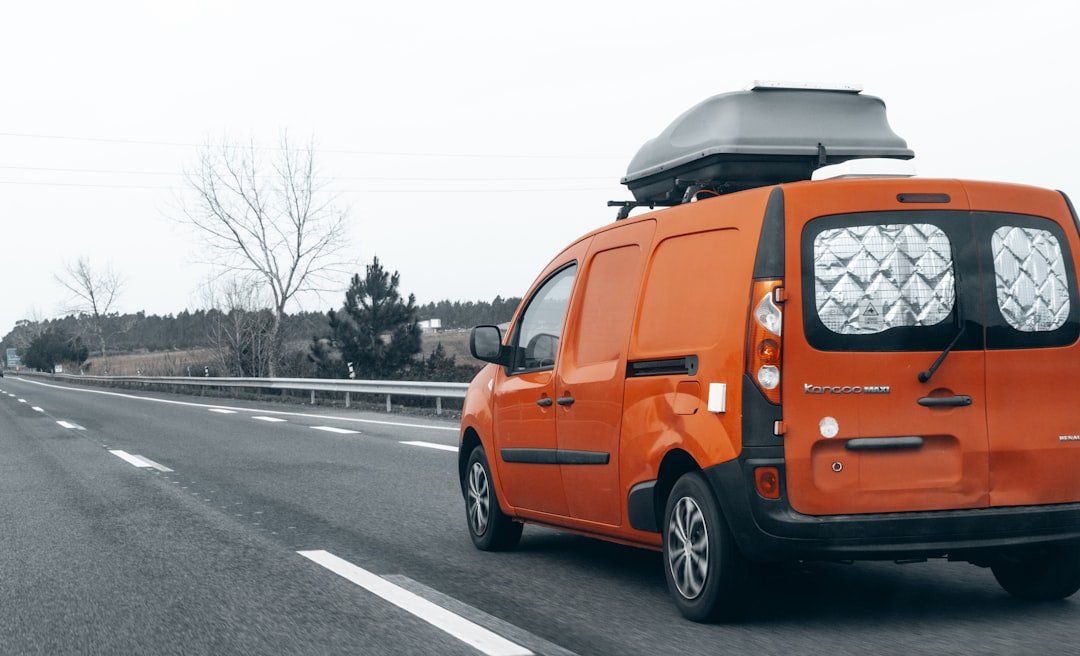
The best roof rack for family road trips isn’t just about strapping something to the roof — it’s about reclaiming interior space while keeping your family comfortable during long drives. If you’re heading out with kids, luggage, and gear, finding the right system now saves you from returning home frustrated or driving with knees pressed against overstuffed duffel bags. We’ve tested countless racks and cargo boxes over years of family road trips, and I’ll show you exactly which ones work and why.
Quick Comparison Table: Popular Roof Racks for Family Travel
| Roof Rack Type | Best For | Weight Capacity | Installation Time | Price Range |
|---|---|---|---|---|
| Cross-bar systems with cargo box | Families needing maximum storage | 100-150 lbs | 45-90 minutes | $250-$600 |
| Basket-style cargo racks | Open cargo and outdoor gear | 80-120 lbs | 30-60 minutes | $150-$400 |
| Aerodynamic cargo boxes (rooftop) | Long highway trips with fuel efficiency concerns | 70-100 lbs | 20-40 minutes | $300-$800 |
| Rail-mounted systems (factory equipped) | Vehicles with factory rails needing versatility | 120-180 lbs | 10-20 minutes | $100-$300 per accessory |
What Makes a Roof Rack Suitable for Long Family Drives
You’d think a roof rack is just a roof rack — turns out installation quality and weight distribution matter enormously. I’ve seen so many drivers arrive at campsites only to discover their cargo shifted during highway driving or discover water leaking into their side panel. The best roof rack for family road trips secures everything at multiple anchor points and uses proper fasteners designed for vehicle weight ratings. Your car’s roof wasn’t built to handle unlimited stress. Most people don’t realize the manufacturer specifies exact weight limits on your vehicle’s roof, sometimes as low as 75 pounds or as high as 200 pounds depending on the model. Exceeding this isn’t just risky — it voids warranties on some vehicles. Crossbar placement matters too. Positioning racks too close to the front or back creates leverage issues and puts unnecessary strain on mounting points. Even weight distribution across both bars is critical.
Aerodynamic design reduces wind noise and fuel consumption during highway speeds.
Factory rails on SUVs and newer sedans offer better integration than aftermarket feet clamped to the roof itself. If your vehicle has them, use them. Vehicles without factory rails need rubber pads and adjustable towers to grip without damaging paint. Quality roof racks also include weatherproofing. Rubber gaskets prevent water from dripping into the vehicle over time, and stainless steel components resist rust. Materials matter for families doing multiple road trips yearly — cheap racks develop squeaks and rattles within months.
Checklist: Before Installing Any Roof Rack System
- Confirm your vehicle’s roof weight capacity by checking the owner’s manual or contacting your dealer
- Verify whether your car has factory roof rails, factory roof gutters, or bare roof requiring a tower system
- Measure the exact length and width of your roof to ensure the rack fits without overhang issues
- Inspect your roof for existing damage, rust, or paint chips before mounting
- Gather tools needed for installation, which typically include socket sets, cross-torque wrenches, and level
- Plan where cargo will sit to maintain roughly 60 percent of weight toward the front of the roof
- Test wind noise at highway speeds on a quiet road before committing to a multi-hour drive
- Check that installed racks don’t interfere with sunroof operation, rear wiper, or antenna
Installing a Basic Cross-Bar Roof Rack System: Step-by-Step
When you need to install this: Your family is leaving for a two-week road trip and you’ve realized your SUV’s interior can’t hold all the luggage without blocking rear visibility or rear-seat passenger space.
Who should do this: Owners with basic mechanical confidence, a level surface to work on, and adequate time before the trip. If you’re uncomfortable climbing on the roof or your vehicle has unusual roof contours, hire a professional installer.
What the process involves: Anchoring crossbars to your roof using provided mounting feet, ensuring proper torque on all fasteners, and testing stability before loading cargo.
- Clean your entire roof with car wash and dry thoroughly to remove dirt and grime that interferes with proper mounting pad adhesion
- Locate all anchor points on your roof or factory rails using the detailed manual that came with your rack system
- Position the first crossbar so it’s parallel to the length of your vehicle and centered side-to-side
- Install rubber mounting pads or use existing factory rails if your vehicle has them, then attach the first bar using all provided bolts
- Use a torque wrench to tighten bolts to the exact specification listed in instructions — over-tightening damages roof panels, under-tightening causes slipping
- Install the second crossbar exactly parallel to the first and the same distance from the roof edge
- Test the system by gently pushing and pulling each bar to confirm no movement or creaking
- If adding a cargo box, position it centered on the bars before tightening its mounting clamps completely
Here’s where most people give up: the bolts feel tight after five minutes of work, but torque specifications exist because roof panels are deformable. Come back after an hour and re-check all fasteners. After the first highway trip, inspect everything again and retighten if needed. This is the part that actually matters — loose racks cause damage and dangerous situations on the road.
My Picks for This
- Thule SquareBar Roof Rack delivers premium aluminum construction that never rusts and mounts to nearly every vehicle design, making it the most versatile choice for families who upgrade cars frequently
- Rhino-Rack Vortex SG2 with Cargo Box combines lightweight engineering with serious weight capacity, letting you load heavy items without concerns about roof stress or excessive wind noise
- Yakima System includes cargo boxes and luggage trays offers complete flexibility because you can swap between an enclosed cargo box for luggage and an open basket for kayaks depending on your trip type
- OEM factory roof rails from your vehicle manufacturer integrate perfectly and come with proven compatibility, saving you installation headaches and providing the highest weight ratings
Cargo Boxes and Extra Luggage Considerations
Once you’ve installed the best roof rack for family road trips, the next decision is what goes on top of it. Cargo boxes designed for cargo boxes and extra luggage come in countless styles. Most families can’t fit a rigid box without consequences — aerodynamic boxes add fuel consumption at highway speeds, sometimes reducing efficiency by 5 to 15 percent. Soft-sided cargo bags offer flexibility but require a roof rack basket underneath for proper support. I’ve been using a hard-shell box for four years because it protects contents from weather during multi-day trips in unpredictable climates, and theft concerns vanish when nobody can see what’s inside. Size ranges from 11 to 24 cubic feet. Don’t assume bigger is always better. Oversized boxes create handling issues in tight parking situations and look disproportionate on smaller vehicles. Most families need somewhere between 14 and 18 cubic feet. Weight-wise, the best roof rack for family road trips means you can still load cargo boxes and extra luggage safely even when you’re already carrying family members and fuel. Calculate expected cargo weight before purchasing any box. If your roof capacity is 150 pounds and you plan to load 80 pounds of luggage, plus gear, you’re approaching the limit before the box itself adds weight.
Common Installation Mistakes That Lead to Roof Damage
Installation failures create expensive repairs. Don’t skip the rubber pad installation if your vehicle has a bare roof. Clamps without pads dig into paint and create water entry points within weeks. Metal fasteners should never contact bare roof metal — corrosion starts immediately. I’ve been installing racks on family vehicles for years and seen recurring problems. Improper torque tops the list. Too tight and you deform the roof skin, creating permanent dents and possible water leaks. Too loose and the system shifts during highway drives, potentially damaging the mounting points and nearby body panels. Incorrect weight distribution causes nose-up or nose-down imbalance that affects handling and increases fuel consumption beyond normal levels. Place the heaviest items toward the front of the rack, centered between the two crossbars. Lastly, mounting systems on vehicles with existing sunroofs requires extra caution because your clamps can interfere with sliding mechanisms or pinch electrical wiring.
Choosing Between the Best Roof Rack for Family Road Trips Based on Your Vehicle Type
SUV owners face different choices than sedan drivers. SUVs often come factory-equipped with roof rails, which means you’re installing cross-bars rather than full tower systems. This saves money and looks cleaner. Sedans and hatchbacks usually need aftermarket tower legs unless they have a gutter lip for clamping feet. Pickup trucks present unique situations because bed space sometimes replaces roof storage needs, but adding a roof rack lets you maximize both bed and roof. Vehicles over ten years old may have surface rust or paint damage that compromises mounting pad adhesion — clean and prime any damaged areas before installation. Minivans actually make excellent candidates for cargo boxes because their low roof height reduces wind resistance compared to tall SUVs. Trucks and vans benefit most from the best roof rack for family road trips because they already sacrifice fuel economy, so aerodynamic losses matter less than the storage benefit.
Check roof clearance before heading to parking garages or car washes.
Frequently Asked Questions (FAQ)
Q1. How much does a quality roof rack system cost?
Quality cross-bar systems typically cost between $200 and $500 depending on brand and material. Adding a cargo box adds another $200 to $400. Factory OEM solutions sometimes cost less because they integrate with existing hardware, while premium aftermarket brands cost more but offer superior durability and aesthetic design.
Q2. Can I install a roof rack myself or should I hire a professional?
Basic installation takes 45 to 90 minutes if you’re mechanically confident and comfortable on a ladder. Professional installation costs $100 to $200 but guarantees proper torque and alignment. First-time installers should expect a longer timeline — take photos of your setup before starting for reference if you remove components later.
Q3. Will a roof rack damage my vehicle’s paint or warranty?
Proper installation with quality rubber pads won’t damage paint. However, improper installation, missing pads, or incorrect torque can dent the roof or create water entry points. Most vehicle warranties remain valid if you use OEM-approved or compatible aftermarket racks, but check your owner’s manual for specifics.
Q4. What’s the weight limit I should follow when loading cargo boxes and extra luggage?
Your vehicle’s roof weight capacity is specified in the owner’s manual or on the driver’s side doorjamb. Most vehicles limit roof loads to between 75 and 200 pounds. Add up the rack weight, cargo box weight, and all cargo — the total must stay within the limit to maintain vehicle stability and prevent warranty issues.
Q5. Does a roof rack affect fuel economy?
An empty roof rack adds minimal drag, but loaded racks and especially cargo boxes reduce fuel economy by 5 to 15 percent at highway speeds depending on box size and vehicle design. Aerodynamic boxes reduce losses compared to flat cargo baskets, so box shape matters more than just having a rack installed.
Q6. How do I prevent wind noise from a roof rack?
Wind noise usually comes from loose fasteners or gaps between components. Verify all bolts are properly torqued and that cross-bars are fully seated in their mounts. Quality racks include rubber isolators that reduce vibration noise. Some noise is normal at speeds above 55 mph but should fade after a few minutes as your ears adjust.
Q7. What’s the best roof rack for family road trips if I also plan to carry bikes and kayaks?
Systems with multiple attachment points work best. Install cross-bars first, then add specific carriers — bike racks fit between bars, kayak mounts attach directly to the bars. Rhino-Rack and Yakima offer modular solutions where you swap accessories depending on your trip, rather than buying separate complete systems.
This post is for informational purposes only and does not constitute professional mechanical advice, legal advice, financial advice, or insurance guidance. Automotive repairs, installations, and modifications involve inherent risks — always consult a certified mechanic or licensed professional before performing any work on your vehicle. Car prices, insurance rates, EV tax credits, product specs, and availability are subject to change without notice and may vary by location, dealership, and individual circumstances. Always verify current details directly with manufacturers, retailers, dealerships, insurance providers, and relevant government agencies before making any purchase or financial decision. Fuel economy figures, EV range estimates, and performance data referenced in this post are based on manufacturer or third-party estimates and may differ from real-world results. This site may contain affiliate links — if you purchase through our links, we may earn a commission at no additional cost to you. Product recommendations are based on general research and editorial judgment; we do not guarantee suitability for your specific vehicle, driving conditions, or personal situation. Always read product instructions, vehicle owner manuals, and safety warnings before use.