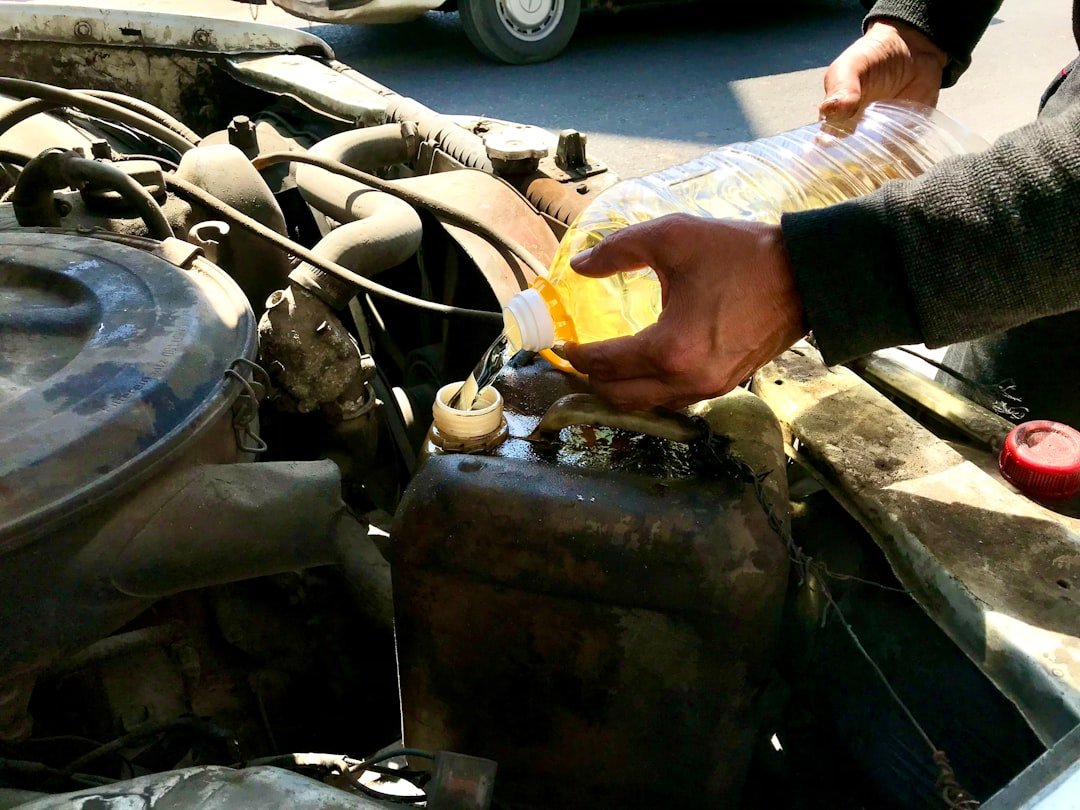
Park on level ground, switch the engine off, and check the dipstick twice before adding anything. That is the safest answer to how to check oil level for beginners, and it prevents a lot of false readings. A quick look is enough. Checking oil takes only a few minutes, but the engine needs time for oil to drain back into the pan so the dipstick shows an honest level instead of a low-looking reading caused by oil still moving through the engine.
Use the owner’s manual first. It tells you whether your specific vehicle should be checked warm or cold, identifies the correct oil grade, and may show a different procedure for vehicles without a traditional dipstick. Most conventional gasoline engines can be checked after the engine has been off for roughly five to ten minutes. Some manuals specify a longer wait. Follow that instruction.
How to check oil level for beginners step by step
- Park on flat, level pavement. A slope can shift the oil in the pan and make the reading look higher or lower than it really is. Keep the parking brake on.
- Turn the engine off and wait. Five to ten minutes is usually enough after normal driving, unless your manual says otherwise. Do not check right after a hard highway run.
- Open the hood securely. Pull the interior hood release, move the safety catch at the front of the hood, and set the prop rod if your vehicle has one. Watch for hot metal.
- Find the oil dipstick. It usually has a small loop or handle, often yellow or orange, near the engine. The handle is not always brightly colored. Your owner’s manual will show its location.
- Pull it out and wipe it clean. Use a lint-free rag, paper towel, or clean shop towel. The first pull often has splashed oil along the blade, so it is not the reading you should trust.
- Push the dipstick fully back in. Seat it all the way, wait a second or two, then pull it out again while keeping the blade pointed downward enough that oil does not run up it.
- Read both sides of the blade. Look at where the wet oil ends in relation to the low and full marks. If the two sides differ slightly, use the lower reading and repeat the test once.
- Reinstall the dipstick completely. Do not leave it loose under the hood. Check that it is fully seated before you close the hood.
Slow is accurate here. The clean-and-reinsert step is the part people skip when using the dipstick correctly, yet it makes the difference between guessing and getting a usable reading. A dipstick can pick up oil mist and splash on its first removal. The second pull shows the level that matters.
How to read the dipstick marks
The lower mark means add oil soon, while the upper mark means the crankcase is at its intended maximum fill level. Simple marks vary. Your dipstick may use two holes, crosshatching, two lines, the words MIN and MAX, or letters such as L and F. Oil anywhere between the marks is generally acceptable.
Do not chase the top line. A level around the middle is fine on most engines, and an oil level slightly under the full mark does not automatically mean there is a problem. The gap between low and full commonly represents about one quart or one liter, but that amount depends on the engine. Check the manual before using the marks to estimate how much oil to add.
If oil is below the low mark, add a small amount rather than dumping in a full bottle. Start with about one quarter of the distance between the marks, which might be around 250 mL or one-quarter quart on many cars. Wait a few minutes. Then wipe, reinsert, and recheck the dipstick. The right amount varies by vehicle.
Overfilling causes problems too. Too much oil can be whipped into foam by moving crankshaft parts, and foamy oil does not lubricate as consistently as liquid oil. Excess oil may also find its way into the intake system or put extra strain on seals. If the level sits clearly above the full mark, avoid assuming it will burn off harmlessly. A shop can advise whether it needs to be drained before driving much farther.
Using the dipstick correctly without misreading it
Good light helps. The oil film can be hard to see, especially when fresh oil is light amber or when the dipstick has a textured section. Hold the clean dipstick against a white paper towel after the second pull if the edge of the oil line is unclear. You want the end of the continuous wet area, not scattered dots higher up the blade.
Check both sides. One side may smear against the dipstick tube as you pull it out, while the other gives a cleaner line. If one side reads full and the other looks near low, wipe it, insert it carefully, and test again. Repeatable results matter more than one odd pull.
Temperature matters somewhat. On many vehicles, checking after the engine has sat overnight gives a stable reading because all the oil has returned to the pan. Other vehicles are designed to be checked at normal operating temperature after a specified waiting period. The manual wins.
Diesel engines deserve extra care. Their oil often turns dark very quickly, even after an oil change, so color alone does not tell you when it is worn out. Some modern vehicles also track oil level electronically through the instrument display. Use that system exactly as the manual directs, since it may require a warm engine, level ground, or a timed wait before the reading appears.
What the oil’s appearance can tell you
Level comes first. The dipstick can also give you a basic clue about oil condition, though it cannot replace a proper diagnosis or the maintenance schedule in your manual. Fresh conventional motor oil often looks golden to brown, then darkens with normal use as it holds combustion byproducts in suspension. Dark oil alone is usually not an emergency.
Look for unusual texture. Oil that appears milky, creamy, or frothy may have water or coolant contamination, although condensation after frequent short trips can sometimes leave a small amount of moisture under the oil cap. Do not dismiss a consistently milky dipstick reading, especially if coolant is disappearing or the engine has been overheating. Have the vehicle checked.
Notice the smell as well. A strong gasoline smell can mean fuel is diluting the oil, which reduces its ability to protect engine parts. Burnt-smelling oil, metal glitter, or gritty particles also deserve attention. Stop guessing if you see those signs. A repair shop can inspect the cause and advise whether the vehicle should be driven.
Do not use oil color as your oil-change clock. Follow the vehicle maker’s time, mileage, and oil-life-monitor guidance, adjusted for severe use such as repeated short trips, towing, dusty roads, or extended idling. Use the exact viscosity and specification listed for your engine. The number on the oil cap may help, but the manual is the better reference.
When to add oil and how to do it safely
Add oil when the level is at or below the low mark, or when your manual tells you to top it up. Buy the correct viscosity and required specification. For example, two oils might both say 0W-20, but a manufacturer can require a particular approval as well. Read the manual and the bottle label.
- Let the engine cool enough to work around safely. Hot exhaust parts can burn you.
- Remove the oil filler cap on top of the engine. It often has an oil-can symbol.
- Place a clean funnel in the opening. Keep dirt out.
- Add a small measured amount, often about one-quarter quart or 250 mL at a time.
- Replace the cap, wait several minutes, then check the dipstick again on level ground.
Keep a rag nearby. Spilled oil can smoke when it lands on hot engine parts, and it can damage some rubber components over time if it sits there. Wipe up any spill before driving. Never pour used oil into a drain or onto the ground. Take it to a recycling location that accepts used motor oil.
If you need to add oil repeatedly, track it. Write down the odometer reading, amount added, and date in your phone or service record. One small top-up between changes may be normal on an older engine, depending on the vehicle and its use. A fast drop is different. Check for drips under the parked vehicle, blue exhaust smoke, a burning-oil smell, or warning lights, then arrange an inspection.
Common beginner mistakes
The most common mistake is checking on a slope. Even a mildly sloped driveway can move enough oil inside the pan to confuse the reading. Another is checking immediately after shutdown, when oil has not fully returned from the top of the engine. Give it time.
Adding a whole quart without rechecking is another easy error. The distance between the marks may not equal a quart on your engine, and the level might already be near full. Add slowly. It is far easier to add another small amount than to remove excess oil.
Do not confuse the transmission dipstick with the engine-oil dipstick on older vehicles that have both. Transmission fluid procedures are different and may require the engine running at a set temperature. The manual will identify each one. Many newer vehicles have no transmission dipstick at all.
Finally, do not rely only on the dashboard oil-pressure warning light. That light usually warns of dangerously low oil pressure, not simply a low oil level, and it can come on after lubrication has already been compromised. If it lights while driving, pull over safely and shut the engine off as soon as practical. Check the manual and seek help before restarting.
FAQ
Should I check engine oil hot or cold?
Check the owner’s manual for the exact method. Many cars give a reliable reading after the engine is warm and has been off for five to ten minutes, while an overnight cold check can also work well on vehicles designed for it. Level ground matters most.
How often should a beginner check oil?
Once a month is a sensible habit for many drivers. Check more often before a long trip, after you notice a leak or warning light, or if the engine has a known history of using oil. It takes minutes.
Can I drive with oil below the low mark?
A reading just below low usually calls for a prompt top-up with the correct oil, not panic. Do not put it off. If the dipstick is dry, an oil-pressure warning appears, or the engine makes unusual knocking sounds, avoid driving until you have checked the situation or contacted a shop.
Why is there oil all over the dipstick?
The first pull often collects splash oil from inside the dipstick tube. Wipe it clean, insert it fully, and pull it again for the real reading. If the second pull still smears badly, let the engine sit longer and repeat.
Does black oil mean I need an oil change?
Not by itself. Engine oil normally darkens as it works, particularly in diesel engines. Use the maker’s service interval or oil-life system, and pay attention to unusual smell, grit, milky appearance, or a rising oil level instead of color alone.
Related posts
This article is for general informational purposes only and is not mechanical, legal, financial, or insurance advice. Prices, insurance rates, tax credits, and manufacturer-stated fuel economy or EV range are estimates that change over time and vary by vehicle, region, and provider — always verify current figures with a dealer, mechanic, insurer, or official source before making a decision.
Disclosure: This post may contain affiliate links. If you click through and make a purchase, we may earn a commission at no extra cost to you. We only recommend products we’ve researched or genuinely believe in.