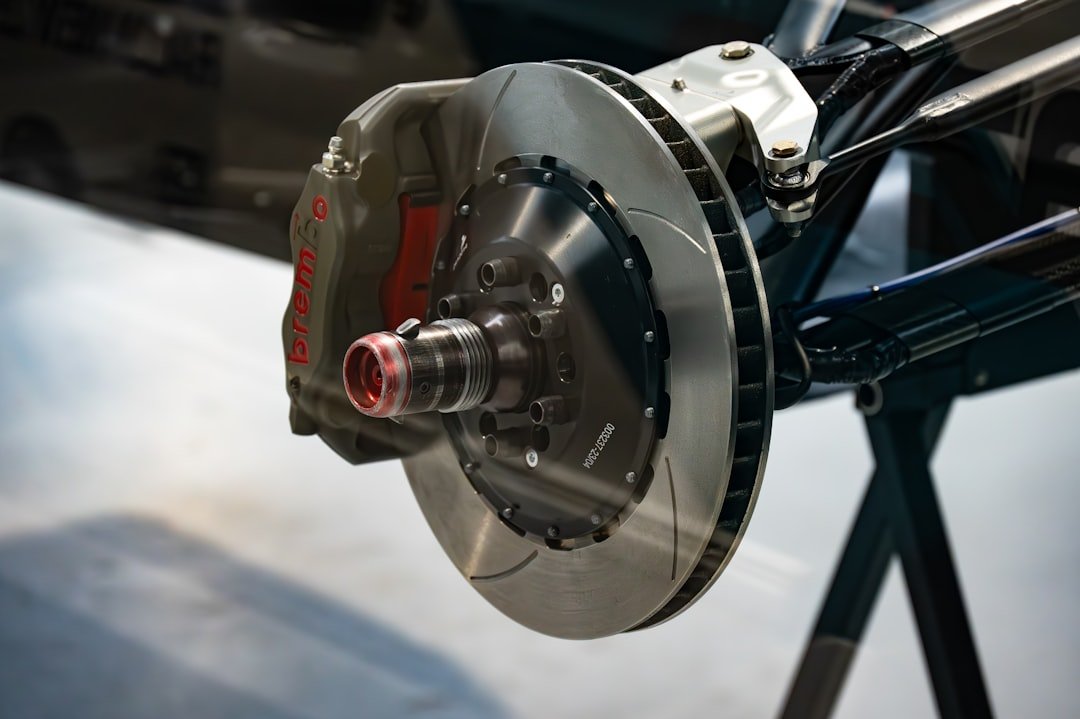
A common misconception is that every squeaky brake means the pads are worn out. Often, the noise comes from harmless surface rust, dust, or vibration, but knowing how to fix a squeaky brake starts with checking for warning signs before applying any lubricant or taking parts apart. Brakes are safety-critical. How to fix a squeaky brake depends on when it squeals, how the pedal feels, and what you find through the wheel.
Know when to stop driving
A brief squeal on the first few stops after rain, washing the car, or an overnight temperature drop is usually surface rust being scrubbed off the rotors. That rust forms quickly. It should fade after several normal, gentle stops.
Do not treat every noise as minor. Park the vehicle and arrange a qualified brake inspection promptly if you hear grinding or a harsh metal scrape, feel a soft or sinking pedal, notice pulling under braking, smell burning material, see smoke, or find a brake warning light on. Those symptoms can point to worn friction material, a seized caliper, contaminated parts, or a hydraulic problem. A squeak is one thing. A change in braking performance is another.
If one wheel is much hotter than the others after a short drive, do not touch the rotor or wheel with bare hands. Heat can burn you. A dragging caliper or stuck parking-brake mechanism may be involved, and continued driving can damage pads, rotors, wheel bearings, and other nearby parts.
Common causes and quick fixes
| When the brake squeaks | Likely cause | Useful next step |
|---|---|---|
| First stops after rain or sitting | Light rust film on rotor faces | Make a few normal stops and see whether it disappears |
| Light squeal with good braking | Pad vibration, dust, or dry hardware contact points | Inspect pads, clips, shims, and slide pins; clean and lubricate only approved metal contact points |
| High-pitched noise near pad replacement time | Wear indicator touching the rotor | Measure pad material and replace pads if they are near the vehicle maker’s limit |
| Noise after a brake job | Missing shims, incorrect hardware, contaminated rotor, or poor pad bed-in | Recheck assembly, clean rotor faces, and follow the pad maker’s bedding procedure |
| Squeal plus vibration, pull, or grinding | Rotor damage, uneven pad wear, caliper trouble, or loose hardware | Stop DIY troubleshooting and have the brake system inspected |
Brake pads naturally vibrate at certain frequencies as they grip and release the rotor. Shims, abutment clips, chamfers in the pad material, and purpose-made brake lubricant all reduce that vibration. They matter. A missing clip or a pad that cannot slide freely in its bracket can make plenty of noise even when the pad has usable material left.
Some pads also squeal more than others. Performance-oriented, semi-metallic pads often tolerate heat well but can be noisier when cold than a comfort-focused ceramic street pad, especially with a rotor that has grooves or a glazed surface. That does not make either type defective. The correct pad compound depends on the vehicle, driving conditions, and the manufacturer’s brake-system design.
How to fix a squeaky brake with safe checks
Start with the easy checks before lifting the vehicle. Look through the wheel spokes with a flashlight if visibility allows. Compare the inner and outer pad thickness only after removing the wheel, because the inner pad is often hidden and can wear differently when a slide pin sticks. Uneven wear tells a story.
- Confirm the pattern. Note whether the sound occurs only when cold, only at low speed, while reversing, during light pedal pressure, or even when you are not touching the brakes. A squeal that changes when you gently apply the pedal is more likely brake-related than a wheel bearing or suspension noise.
- Check the wheel area. Look for a bent dust shield touching the rotor, trapped gravel, obvious rotor scoring, loose wheel hardware, or a shiny metal tab contacting the rotor. A dust shield can make a sharp scrape or chirp and may sometimes be bent back carefully without removing brake parts.
- Inspect pad thickness. Remove the wheel only on level ground, with the vehicle secured according to its manual. Use wheel chocks, a proper jack point, and jack stands. Never work under a car supported only by a jack.
- Examine the hardware. With the caliper removed and supported so the hose is not strained, inspect anti-rattle clips, pad shims, pad ears, and caliper slide boots. Replace bent, corroded, loose, or missing hardware rather than trying to make damaged clips work.
- Clean the braking surfaces. Use a brake cleaner that is suitable for brake components and let it dry fully. Clean dust and residue from the caliper bracket, clips, and pad contact areas. Do not blow brake dust into the air with compressed air.
- Lubricate only approved contact points. Apply a very thin film of high-temperature brake lubricant to pad backing plates where shims contact, pad ears where they ride in bracket clips, and slide pins if the vehicle design calls for it. Keep lubricant off pad friction material, rotor faces, and tire surfaces. One smear is enough.
- Reassemble and torque correctly. Use the vehicle maker’s torque specifications for caliper fasteners and wheel nuts. Tighten wheel nuts in the specified pattern. Guessing is risky.
- Test carefully. Before driving, pump the brake pedal until it feels firm because pushing the caliper piston back creates temporary pedal travel. Make the first test in a quiet, low-speed area and verify normal pedal feel and stopping response.
If the pads are close to their replacement limit, replace them rather than trying to silence them. Many vehicles use a small metal wear indicator that deliberately squeals against the rotor to call for service. The exact minimum thickness varies by vehicle and pad maker. Check the service information or ask a shop to measure it.
Cleaning and lubricating the right places
This is where otherwise careful DIY jobs go wrong. Brake lubricant is for moving or touching metal surfaces outside the friction area, not for the face of a pad or rotor. Any grease on those surfaces can reduce braking and ruin the pad. Keep it clean.
Remove old crusty lubricant from the caliper bracket lands and from reusable pad shims before applying fresh product. Rust buildup under stainless abutment clips can pinch the pad ears, so clean that area carefully without removing enough metal to loosen the clips. The pad should slide smoothly. It should not rattle around.
Slide pins deserve a close look. A healthy pin moves smoothly under its boot and has the lubricant type specified for rubber-compatible caliper parts; petroleum grease can swell certain rubber components. If a pin is rusty, pitted, seized, or its boot is torn, replacing the damaged pin, boot, or caliper assembly may be the sensible repair. Forcing it loose rarely makes a lasting fix.
Do not put ordinary grease on the backs of pads as a substitute for a proper brake product. Do not use anti-seize on slide pins unless the vehicle documentation specifically calls for it. Different compounds react differently to heat and rubber. The label matters.
Check rotors, pads, and installation errors
A rotor with deep grooves, heavy rust around the swept area, blue heat spots, cracking, or an obvious lip can contribute to noise and poor braking. Rotor thickness and runout need measuring tools and the vehicle’s specifications, so visual inspection has limits. A smooth-looking rotor can still be below its discard thickness. Measure first.
Glazed pads can also squeal. Their friction surface looks unusually shiny or hard after repeated overheating, hard stops, or a dragging caliper. Light glazing may sometimes be addressed during a proper brake service, but badly heat-damaged pads and rotors are usually better replaced as matched axle sets. Replace parts in pairs on the same axle.
If the squeak began immediately after new pads or rotors were fitted, revisit the work. Common mistakes include leaving old clips in place when new hardware came in the box, putting inner and outer pads in the wrong positions, failing to clean preservative oil from new rotors, or skipping the pad maker’s bed-in procedure. Small errors matter here. If you are unsure about anything in the assembly, have a shop inspect it before driving normally.
Bed new pads and rotors correctly
New pads and rotors often need a bedding process to transfer an even layer of pad material onto the rotor face. Follow the instructions supplied with the pads because speed, number of stops, and cooling time differ by compound and vehicle. Do not improvise a series of hard stops on public roads. Find a legal, clear place.
A typical bedding routine may involve several moderate decelerations, followed by a period of driving without holding the brakes on while stopped so the parts can cool. The goal is controlled heat, not smoke or a burning smell. If the pedal changes, the vehicle pulls, or the brakes overheat, stop and investigate rather than completing the routine.
After a brake job, avoid sitting with a hard pedal pressed at a stop immediately after repeated heavy braking when possible. Hot pads can leave uneven deposits where they sit against the rotor, and that may lead to vibration or noise later. Use normal caution. Keep the car secured.
When a quick fix is not enough
Repeated squealing after cleaning and correct lubrication can mean the noise is inherent to the pad compound, but it can also mean the underlying issue was missed. A caliper piston may not retract correctly. The rotor may have excessive runout. The parking brake may drag, especially on a rear disc setup with an integrated mechanism.
Pay attention to one-sided wear. If the inboard pad is much thinner than the outboard pad, a sticking slide pin is often suspect. If the outboard pad is much thinner, the caliper itself or bracket movement may need inspection. These are patterns, not final diagnoses. A shop can check caliper operation, rotor measurements, and hydraulic condition with the right tools.
Noise that happens without pedal application may come from something else entirely, such as a backing plate, loose wheel hardware, a stone, or suspension movement. Do not keep adding brake lubricant to chase an unidentified sound. Find the source first.
Frequently asked questions
Can I spray lubricant through the wheel to stop brake squeal?
No. Spraying anything through the wheel can contaminate the rotor and pads, which can reduce braking performance and create a much bigger repair. Brake lubricant belongs only on specific cleaned contact points during proper disassembly. Keep it off friction surfaces.
Why do my brakes squeak only in the morning?
Moisture can leave a thin rust layer on bare cast-iron rotors overnight, especially after rain or high humidity. The first stop removes it. If the noise fades quickly and braking feels normal, that pattern is usually less concerning than a squeal that persists through every drive.
Will new brake pads always stop the squeak?
No. New pads can still squeal if the rotors are worn, hardware is missing, slide pins stick, or the pad compound is naturally noisy. New parts also need correct installation and bedding. Check the complete brake assembly.
Can worn brake pads make a squealing sound?
Yes. Many pads have wear indicators designed to make a high-pitched warning noise as pad material gets low. Inspect the pads soon, because waiting until metal contacts metal can damage the rotors and raise the repair cost. Do not wait for grinding.
Related posts
This article is for general informational purposes only and is not mechanical, legal, financial, or insurance advice. Prices, insurance rates, tax credits, and manufacturer-stated fuel economy or EV range are estimates that change over time and vary by vehicle, region, and provider — always verify current figures with a dealer, mechanic, insurer, or official source before making a decision.
Disclosure: This post may contain affiliate links. If you click through and make a purchase, we may earn a commission at no extra cost to you. We only recommend products we’ve researched or genuinely believe in.