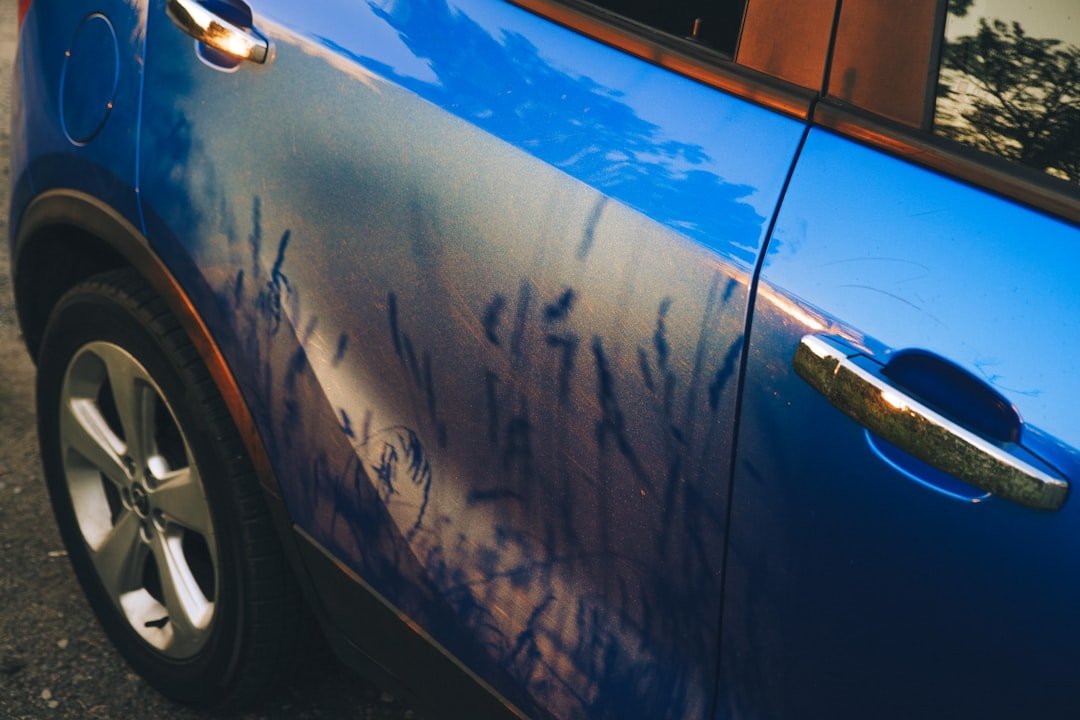
You can learn how to remove scratches from car paint at home if the damage is limited to the clear coat or upper paint layer. Deep gouges need different treatment. How to remove scratches from car paint at home comes down to identifying the scratch before buying polish, compound, or touch-up paint, because an aggressive product can make thin paint look worse.
Start with clean paint and good light. Dirt can hide the true depth of a mark, and rubbing grit across a panel creates fresh scratches that were not there before. Take your time.
How to remove scratches from car paint at home safely
Modern vehicle paint usually has three layers: clear coat on top, colored base coat beneath it, and primer below that. Metal or plastic sits under those layers. Most swirls, wash marks, and light scuffs only affect the clear coat. Those are the repairs that respond best to a home polish.
Look at the scratch after washing and drying the area. A simple fingernail test helps. Lightly drag a clean fingernail across the mark. If your nail does not catch, the damage is often in the clear coat and may polish out or become much less visible. If it catches firmly, expect to use touch-up paint or accept that a body shop has the better path to a near-invisible repair.
Color offers another clue. A white line on a dark car can be transferred paint from a wall, another vehicle, or a shopping cart. It is often removable. A dark line on a light-colored car may be exposed primer or bare substrate. Do not guess.
| What you see | Likely damage | Home approach |
|---|---|---|
| Hazy swirls visible in sun | Clear-coat marring | Fine polish and microfiber towels |
| Scuff with another color on top | Paint transfer | Wash, then use mild polish slowly |
| Scratch catches a fingernail | Deep clear coat or base coat damage | Clean, touch up if needed, then protect |
| White, gray, or dark material below paint | Primer or bare metal exposed | Touch-up promptly; consider a shop repair |
| Cracked, peeling, or dented panel | Paint and panel damage | Body shop assessment is usually sensible |
Gather the right supplies
You do not need a cabinet full of detailing products. A careful hand repair often needs car shampoo, clean water, several quality microfiber towels, a clay bar or synthetic clay mitt if the paint feels rough, a finishing polish, an applicator pad, masking tape, and a paint sealant or wax. Keep towels clean.
For deeper marks, add manufacturer-matched touch-up paint, a small fine brush or touch-up applicator, primer if bare metal is exposed, and clear coat if the touch-up system calls for it. Check your vehicle paint code on its identification label or confirm it with a dealer parts department. Paint names alone can be misleading.
A dual-action polisher can speed up correction on larger panels, but it is not required for one scratch. It also has a learning curve. Hand polishing is slower, yet it gives a beginner more time to stop and inspect the surface before removing too much clear coat.
Wash and inspect the panel first
Park in shade on a cool panel. Hot paint makes soap dry quickly, and dried residue can interfere with inspection. Wash the whole affected section with proper car shampoo, using a clean mitt and plenty of water. Household dish soap can strip existing protection and is not the best routine choice.
Dry the area with a fresh microfiber towel by blotting or gently pulling the towel across the panel. Avoid using an old bath towel. Its fibers and trapped dirt can add fine marring while you work.
Then feel the paint inside a thin plastic sandwich bag or with clean fingertips. Roughness may be bonded contamination rather than a scratch. Lubricated clay can remove that contamination, but use it gently and follow with polish because clay itself can leave faint marks on some finishes.
Remove paint transfer and light scuffs
For a scuff that appears to sit on top of the clear coat, begin with the mildest option. Apply a small amount of finishing polish to a foam or microfiber applicator. Work an area about the size of a dinner plate with overlapping straight passes and moderate pressure for 30 to 60 seconds.
Wipe residue with a clean towel and inspect the panel from more than one angle. Stop often. If the transferred color is fading and the original paint looks clear, repeat one or two times rather than moving immediately to a heavier compound.
A rubbing compound cuts faster than finishing polish. That is useful on more pronounced clear-coat scratches, but every abrasive polish removes a little clear coat. Factory paint has limited film thickness, especially on edges, body lines, and panels that may have been repainted before. Stay off sharp edges with aggressive products.
Do not reach for toothpaste, kitchen scouring pads, brake cleaner, or random solvents. They can scratch, stain, or soften trim and paint. A product sold for automotive paint correction is easier to predict when used according to its label.
Polish clear-coat scratches carefully
When a scratch does not catch your fingernail but remains visible, use a test spot first. Tape off a small section near the scratch, then polish only that area. This gives you a reference point and prevents you from working an entire door without knowing whether the product is helping.
- Apply a few small drops of polish to the applicator.
- Spread it over the paint before applying pressure.
- Use overlapping passes across the scratch, then across it again at a right angle.
- Buff the residue with a clean microfiber towel.
- Inspect under direct light before repeating.
Use enough pressure to keep the pad flat, not enough to bend it around an edge. Keep the pad moving. A light scratch may need several sessions, but stop when progress slows. Chasing the last faint line can remove more clear coat than the visual improvement is worth.
If you use a dual-action machine, start with a polishing pad and a mild polish rather than a cutting pad and heavy compound. Work a small area. Keep the pad flat and clean it frequently, because a loaded pad loses consistency and can drag old abrasive residue across the finish.
Repair scratches through the color coat
A scratch that catches your nail or shows primer needs touch-up rather than more polishing. Polish cannot replace missing color. The goal at home is usually to seal the damaged area, reduce how obvious it looks, and keep water away from exposed metal.
Clean the scratch with car shampoo, dry it fully, and use a small amount of paint prep product only if the touch-up paint maker specifies one. Mask the surrounding area if your hand is unsteady. Apply paint in thin layers inside the damaged channel instead of brushing a thick blob across the panel.
Let each layer dry as directed on the product label. Patience matters here. Thick touch-up paint shrinks, traps solvent, and often leaves a tall hard ridge that looks worse than a carefully built repair.
If bare steel is visible, use the appropriate primer if your touch-up system requires it, then add color. Bare metal deserves prompt attention. Rust can spread beneath surrounding paint, and a small repair becomes more involved once corrosion lifts the edge of the finish.
Clear coat can be added after the color coat has cured if the system includes it. Do not wet sand fresh touch-up paint unless you understand the process, have enough cure time, and are prepared for imperfect results. Sanding removes material fast, especially with 1,500- or 2,000-grit paper.
Protect the repaired area
After polishing, the panel needs fresh protection because the process may remove old wax or sealant. Apply a paint sealant, wax, or other compatible protection product after the surface is clean and the touch-up repair has cured for the time stated by its manufacturer. This step is simple.
Protection will not fill a deep scratch permanently, but it helps water bead and makes routine washing easier. Wash with clean tools afterward. Many light scratches come back because the car is washed with dirty mitts, gritty buckets, or towels that have been dropped on the ground.
Know when to stop and call a body shop
A home repair makes sense for a small clear-coat scratch, paint transfer, or a chip you mainly want to seal. A body shop is usually the smarter choice when the panel is dented, paint is cracked over a crease, a large area needs blending, or the scratch runs through primer to metal. Those repairs can require sanding, filler, spray equipment, and color blending into adjacent panels.
Be especially cautious around sensors, cameras, plastic bumper covers, matte finishes, and satin paint. Matte paint cannot be conventionally polished without changing its sheen. If the damaged panel has paint-protection film or vinyl wrap, ask an installer or repair shop before using compound, touch-up paint, or solvent.
For most owners, the practical target is improvement and protection, not perfection. Good lighting, clean towels, a mild first step, and realistic expectations will get you farther than a harsh compound used in a hurry. Inspect every pass.
This article is for general informational purposes only and is not mechanical, legal, financial, or insurance advice. Prices, insurance rates, tax credits, and manufacturer-stated fuel economy or EV range are estimates that change over time and vary by vehicle, region, and provider — always verify current figures with a dealer, mechanic, insurer, or official source before making a decision.
Disclosure: This post may contain affiliate links. If you click through and make a purchase, we may earn a commission at no extra cost to you. We only recommend products we’ve researched or genuinely believe in.